
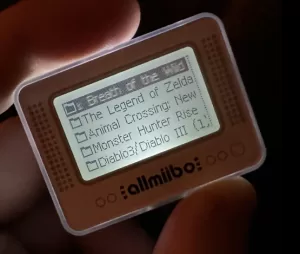
1. Getting Started
When you launch the Amiibo Database app from the main screen, you are essentially accessing a generator that creates a temporary virtual Amiibo in memory.
-
Unique IDs: Every time you select an Amiibo from the database, the device generates a Random UUID. This means the console will see it as a "fresh" Amiibo.
The Main Menu
Upon opening the app, you will see five main options:
-
Browser...
-
Search...
-
My Favorites...
-
My Amiibo...
-
Settings...
2. Browsing & Selecting Amiibos
Select Browser... to explore the full library.
-
Navigation: Use the Side Buttons (on the thumbwheel) to scroll through categories or individual Amiibos. Press the Middle Button to select.
-
The Display: Once selected, the screen shows the Amiibo's Name and its current temporary UUID.
The Action Menu
While viewing an Amiibo's details, press the Middle Button to open the Action Menu. Here you can customize how the tag behaves:
-
Rand. Tag (Randomize): Generates a new UUID immediately. Use this if you want the game to think you’ve tapped a completely different figure of the same character.
-
Auto Rand. (Automatic Random): When turned ON, the device generates a new UUID every time the game reads the tag. This is perfect for games with "one use per day" limits (like Breath of the Wild), allowing you to scan the same "Amiibo" infinitely.
-
Favorite...: Adds the current Amiibo to a folder for quick access later.
-
Save As...: Saves the current Amiibo (with its specific data) into one of your "My Amiibo" slots.
3. Searching
Don't want to scroll through lists? Use Search....
-
Enter a partial name to find specific characters.
-
The results list functions exactly like a category in the Browser—you can select any result and use it immediately.
4. Managing Favorites
The My Favorites... section lets you organize frequently used characters into folders.
How to Manage Folders: Highlight a folder and Press and Hold the Middle Button to see options:
-
New...: Create a new custom folder.
-
Empty...: Remove all Amiibos inside the selected folder.
-
Delete...: Remove the folder entirely.
Using Favorites: Click into any folder to see your saved characters. Selecting one makes it the "Current Amiibo," functioning exactly as if you had found it in the main Browser.
5. My Amiibo Slots
This section lists your configured virtual slots. Unlike the temporary database entries, these slots can hold specific data.
-
Navigation: Scroll with side buttons, select with the middle button.
-
Resetting: Press and Hold the Middle Button on a slot to wipe it/reset it.
-
Read-Only Mode: If you have enabled the "Read-only" feature, an info icon will appear next to the name, and the device will block the game from writing data to that slot.
6. Settings
Configure the backend of the application here.
-
Keys [Loaded/NOT Loaded]: Checks if your
key_retail.binfile is correctly detected. If this says "NOT Loaded," the database will not work. -
Slot Num. [10 - 50]: Choose how many virtual slots you want available in the "My Amiibo" section. You can increase this in increments of 10, up to a maximum of 50 slots.


Comments
No comments yet. Be the first to share your thoughts.